


News & Blogs

How to Buy Free Standing Giant LED Letters in 2026?

Buying free standing giant led letters in 2026 requires more than choosing the brightest display. You need a safe, durable, and visually consistent installation.

David Hickey, a respected sign-industry professional, has described signage as “a silent salesperson.” That idea matters here. Your letters should attract attention, communicate clearly, and support the event’s atmosphere without overwhelming it.

Start with the venue. Measure doorways, elevators, stage access, and the final display area. A 1.5-meter letter may look impressive online but become difficult to transport. Check the letter depth, base stability, cable placement, and total weight before ordering.

Then examine construction quality. Aluminum frames, protected LED modules, sealed wiring, and weighted bases usually offer better long-term reliability. Ask whether the lighting is dimmable. Bright white LEDs can appear harsh in photographs, especially against glossy floors. Warm white, RGB, or adjustable color options may create a more controlled effect.

Safety comes first.

Request certification details, power requirements, warranty coverage, and replacement-part availability. Outdoor use also requires suitable weather protection, but product labels can be unclear. Ask for the actual IP rating and operating limits.

A supplier’s photos are useful, but they are not proof of performance. Request recent installation videos, close-up images, and customer references. I would also inspect one sample letter whenever possible. Small defects become obvious when several letters stand together.

Price remains important, yet the cheapest option may bring unstable bases, uneven brightness, or slow repairs. This guide explains how to compare free standing giant LED letters carefully, realistically, and with room for better judgment.
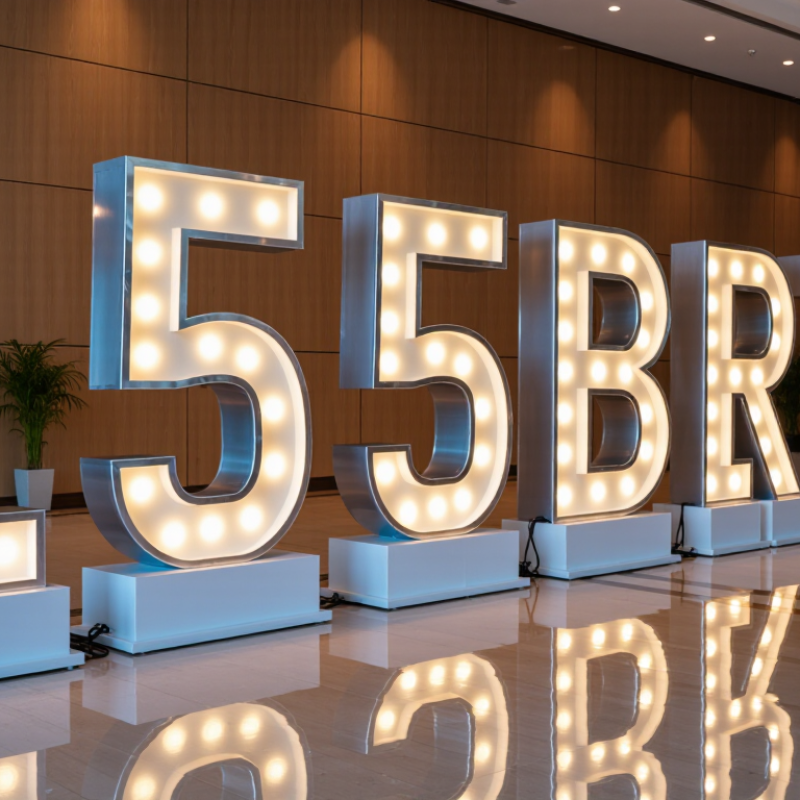
How to Buy Free Standing Giant LED Letters in 2026?

What Free-Standing Giant LED Letters Are and How They Work

How to Buy Free Standing Giant LED Letters in 2026?

Free-standing giant LED letters are oversized illuminated signs that stand independently on a floor, platform, or weighted base. Each letter usually contains LED modules, wiring, a power supply, and a controller. When connected, these parts create steady light, chasing effects, or color changes. Unlike backlit acrylic letters, LED letters can produce stronger visual impact from several viewing angles. Their structure also demands careful attention to stability, cable routing, and weather protection.

Energy use matters during long events. The U.S. Department of Energy reports that LED lighting uses at least 75% less energy than incandescent lighting and can last up to 25 times longer. Still, brightness claims may not match real conditions. Direct sunlight, frosted covers, and uneven LED spacing can reduce perceived intensity. Ask for measured power consumption, lumen information, operating temperature, and a short video of the exact letter style. A professional supplier should also explain installation weight and maintenance access.

Tips: Check the base width before ordering. Measure doorways, elevators, and storage areas. Choose low-voltage systems with protected connectors and certified power supplies. Request a sample letter first. It may reveal uneven lighting. Leave space behind each letter for airflow and cable access. For outdoor use, confirm the enclosure rating and anchoring method. Never assume a heavier letter is automatically safer; poor weight distribution can still cause tipping. Forecast the full cost, including delivery, setup, cleaning, and replacement modules.

How to Choose the Right LED Letter Size, Style, and Materials

When buying free standing giant LED letters in 2026, measure the display area before choosing a style. A six-foot letter may look impressive outdoors but overwhelm a narrow entrance. For photo backdrops, letters between three and five feet often balance visibility and guest movement. Check viewing distance, ceiling height, doorway width, and storage space. I once saw a letter set fit the venue but block the service path. It looked attractive, yet the layout was impractical.

Choose the letter style according to the event’s mood and lighting conditions. Bulb-style letters create a warm, classic appearance, while sealed LED faces look cleaner and more modern. Front-lit letters work well for photographs. Halo-lit designs produce softer edges against darker walls. Request photos from different angles, not only polished front images. Ask whether brightness can be adjusted, because intense lighting can wash out faces and nearby decorations.

Material quality affects safety, weight, and long-term appearance. Powder-coated metal frames usually resist scratches better than thin painted panels. Acrylic faces can diffuse light evenly, but they may crack under rough transport. Confirm the base design, cable placement, weather resistance, power requirements, and replacement process. For outdoor use, ask for documented protection ratings and stable weighted feet. Do not rely on vague claims. A supplier with installation experience should provide accurate dimensions, load details, and maintenance guidance. My preference is sturdy construction over decorative extras, although this can increase delivery weight and handling costs.

How to Buy Free Standing Giant LED Letters in 2026?

Choosing the right LED letter height starts with the viewing distance. This planning chart uses the common rule of thumb that 1 inch of letter height provides approximately 10 feet of readable distance.

2–3 ft letters

Suitable for entrances, photo areas, weddings, and indoor event displays with close-to-medium viewing distances.

4–5 ft letters

A practical choice for trade shows, retail spaces, hotel lobbies, and larger indoor venues.

6 ft letters

Best for outdoor activations and large venues where the display must remain visible from farther away.

Style and materials

Choose front-lit acrylic for a clean glow, metal or aluminum for durability, and weighted steel bases for improved stability.

How to Compare Suppliers, Prices, and Customization Options

How to Buy Free Standing Giant LED Letters in 2026?

Buying free standing giant LED letters requires more than comparing the lowest quotation. Measure the display area, entrance width, and power access before contacting suppliers. A 1.2-meter letter may look impressive outdoors but create transport problems indoors. Ask each supplier for drawings, letter dimensions, total weight, base details, and lighting specifications. Request photos of completed installations, not only polished computer images.

Compare prices line by line. One quote may include steel frames, LED modules, wiring, paint, packaging, and delivery. Another may exclude installation or replacement parts. Confirm whether the price covers indoor or outdoor protection, because weather-resistant materials usually cost more. Ask about warranty length, controller quality, repair procedures, and expected production time. Get the payment schedule in writing. Small omissions become expensive.

Customization affects both appearance and reliability. Check font shape, color temperature, brightness control, cable exit points, and base finish. Warm white light can feel elegant, while cool white light appears sharper in photographs. For outdoor events, sealed connectors and stable ballast matter. Request a physical color sample when possible. Digital previews can be misleading.

I once focused too heavily on lettering style and overlooked the base width. The result looked attractive but needed extra handling space. That mistake changed my supplier checklist.

A short video showing the letters switched on can also reveal uneven brightness, visible wiring, or flickering modules. Get everything documented before production begins.

How to Check Safety, Power, and Installation Requirements

How to Buy Free Standing Giant LED Letters in 2026?
How to Check Safety, Power, and Installation Requirements

Before buying giant LED letters, inspect the frame, base plates, wiring, and light diffusion panels. Each letter should stand level on a stable, load-bearing surface. Ask for the total weight, wind-load guidance, and anchoring method. Outdoor units need weather-resistant construction, sealed cable entries, and drainage points. Do not rely on appearance alone. A bright display can still hide weak welds or exposed connections.

Power planning deserves equal attention. Request the voltage, wattage per letter, total amperage, and recommended circuit capacity. Leave spare capacity for startup demand and future additions. Check cable lengths before installation; short cables may force unsafe extensions across walkways. Use a qualified electrician to verify grounding, protective devices, and local venue requirements. I once underestimated cable distance by several meters. That small mistake delayed setup and changed the layout.

Tips: Photograph the installation area before ordering. Mark doors, ramps, drains, and emergency paths. Confirm whether ballast, bolts, lifting points, or a distribution box are included. Test one letter for heat, flicker, and connector fit before assembling the full display. Keep the user manual and inspection records nearby. Weather changes quickly, and a dry setup may not stay safe outdoors.

How to Buy Free Standing Giant LED Letters in 2026? - How to Check Safety, Power, and Installation Requirements

A practical purchasing and installation checklist for evaluating freestanding illuminated letters

Evaluation Area What to Check Typical Benchmark or Requirement Documents or Measurements to Request Priority
Product Size Overall height and width Confirm the exact finished dimensions, including feet, base plates, access doors, and cable outlets. Allow additional clearance for transport and installation. Dimensioned drawing, elevation view, and installation footprint. Required
Product Weight Weight of each letter and base Use the actual shipping and installed weight rather than an estimated visual weight. The supporting surface must be checked for the combined dead load. Weight schedule for every letter, base, ballast, and fixing component. Required
Stability Center of gravity and tipping resistance A tall, narrow letter may require a wider base, concealed ballast, mechanical anchoring, or a connected support frame. Stability must be assessed for the complete assembled unit. Base detail, center-of-gravity information, anti-tip method, and stability calculation. Required
Wind Load Outdoor wind exposure Obtain the local basic wind speed and exposure category from the applicable building regulations. For preliminary review, wind pressure can be estimated by q = 0.613 × V² in N/m² when V is in m/s; final design requires a qualified calculation. Wind-load calculation, local design wind speed, projected area, fixing details, and engineer review where required. Required
Base Fixing Anchors, ballast, and substrate Concrete, paving, soil, decking, and temporary event flooring have different load capacities. Anchor type, embedment, edge distance, and pull-out resistance must match the substrate. Anchor schedule, base-plate drawing, substrate information, and installer method statement. Required
Electrical Input Supply voltage and frequency Verify whether the system accepts the local mains supply, commonly 100–120 V or 220–240 V AC at 50/60 Hz. Do not connect equipment outside its marked input range. Electrical rating label, wiring diagram, installation manual, and regional conformity documentation. Required
LED Circuit Low-voltage LED modules and drivers Many illuminated letters use 12 V DC or 24 V DC LED modules supplied by remote or internal drivers. The LED voltage must match the driver output voltage. LED module voltage, driver output rating, wiring diagram, and polarity instructions. Verify
Power Demand Total wattage Calculate the total load by adding the marked wattage of every letter, driver, controller, and accessory. Do not size the circuit from the LED module wattage alone. Per-letter wattage schedule and maximum system wattage. Required
Circuit Capacity Operating current and circuit margin For single-phase systems, use I = P ÷ V. Select circuit protection and conductors according to local electrical rules, installation method, ambient temperature, and continuous-load requirements. Load calculation, breaker rating, conductor size, voltage-drop calculation, and electrician approval. Required
Voltage Drop Long cable runs Check voltage at the furthest letter under full load. Excessive voltage drop can cause uneven brightness, flicker, or driver failure; the permitted value depends on local electrical rules and the equipment design. Cable length, conductor cross-section, load current, and voltage-drop calculation. Verify
Protection Residual-current and ground-fault protection Outdoor and damp-location circuits generally require additional residual-current or ground-fault protection. The trip rating and test requirements must follow the applicable local code. Protection-device specification, earthing diagram, test procedure, and commissioning record. Required
Grounding Protective earth and bonding All accessible conductive parts that could become energized must be bonded or grounded where required. Class II or double-insulated equipment must be identified and installed as specified. Grounding continuity test, wiring diagram, enclosure classification, and inspection record. Required
Ingress Protection IP rating for the actual location Use the IP code defined by IEC 60529 or the applicable national equivalent. Outdoor exposure, rain direction, splash, dust, and temporary immersion risks must be considered; an IP rating is not a substitute for correct installation. Enclosure IP rating, test report or declaration, gasket details, and cable-gland specification. Verify
Drainage Condensation and water drainage Enclosures should prevent trapped water and provide the drainage or ventilation specified by the design. Drain holes must not compromise the required protection level. Section drawings, drainage locations, breather details, and maintenance instructions. Required
Materials Structure, finish, and corrosion resistance Select materials and coatings for the site environment, including coastal salt, industrial pollution, humidity, cleaning chemicals, and temperature variation. Material specifications, coating system, fastener grade, and corrosion-protection details. Verify
Thermal Safety Heat dissipation and clearance Maintain the manufacturer’s clearance around drivers, ventilation openings, and heat-producing components. Do not cover vents or place combustible materials against hot surfaces. Maximum surface temperature, thermal test data, ventilation requirements, and clearance diagram. Required
Lighting Performance Brightness, color, and uniformity Specify the required color temperature, dimming range, brightness limit, and acceptable luminance uniformity. Outdoor displays may be subject to local light-pollution or nuisance-light rules. Lighting schedule, sample section, dimming method, and nighttime commissioning plan. Verify
Controls Timer, dimmer, sensor, or controller Confirm control voltage, maximum connected load, enclosure location, emergency shutoff method, and whether automatic dusk-to-dawn operation is required. Control schematic, programming settings, operating instructions, and manual override procedure. Verify
Installation Assembly sequence and lifting Large letters may require multiple installers, lifting equipment, temporary bracing, exclusion zones, and a defined assembly sequence. Never lift from LED faces, trim, or unapproved points. Lift plan, handling points, assembly instructions, equipment list, and risk assessment. Required
Public Safety Edges, trip hazards, and access Protect sharp edges, secure loose cables, maintain required pedestrian clearance, and prevent public access to electrical compartments and moving or removable parts. Site layout, accessibility review, cable-routing plan, edge-protection details, and barrier plan. Required
Compliance Applicable electrical and building requirements Check the electrical, structural, fire, accessibility, signage, planning, and temporary-event requirements for the installation jurisdiction. Requirements differ by country, city, property type, and installation duration. Permits, inspection requirements, declarations of conformity, test certificates, and engineer sign-off where applicable. Required
Maintenance Service access and replacement Provide safe access to drivers, connectors, LED modules, fuses, and drainage points. Define isolation, cleaning, inspection, and replacement procedures before purchase. Maintenance manual, spare-parts list, access-panel drawings, and recommended inspection intervals. Verify
Purchasing Scope, warranty, and acceptance criteria The quotation should state dimensions, materials, finish, light output, power consumption, protection rating, fixing method, delivery condition, installation scope, testing, and warranty exclusions. Detailed quotation, approved drawings, inspection checklist, delivery schedule, and written warranty terms. Required

Planning note: Values such as voltage, wattage, current, IP rating, wind resistance, and fixing capacity must be confirmed from the final product documentation and the local authority requirements.

Safety note: Structural anchoring, mains electrical work, grounding, and public-area installation should be reviewed or completed by appropriately qualified professionals.

Calculation note: The wind-pressure equation shown is for preliminary estimation only. It does not replace a project-specific structural design or local code calculation.

How to Order, Inspect, Transport, and Maintain LED Letters

How to Buy Free Standing Giant LED Letters in 2026?

Ordering free-standing giant LED letters requires more than choosing a height and color. Ask for drawings showing letter depth, base structure, LED layout, power load, cable exits, and outdoor protection. The U.S. Department of Energy reports that LEDs use at least 75% less energy and can last up to 25 times longer than incandescent lighting. Request test records, rated lifespan, warranty terms, and replacement-module availability. A cheaper quote may hide weak bases or difficult servicing.

Inspect a production sample before shipment. Check welds, paint coverage, acrylic faces, brightness consistency, fasteners, and controller response. Confirm the actual IP rating, not only “weatherproof.” IEC 60529 defines IP protection levels, but installation quality still matters. Photograph every side and record crate dimensions. Large letters can look strong yet suffer damage at lifting points. That mistake is easy to make. Use padded frames, moisture barriers, shock indicators, and upright transport when the structure requires it. Confirm unloading equipment and doorway clearance before dispatch.

At installation, level each base and protect cables from standing water, vehicle routes, and sharp edges. Schedule visual inspections monthly, especially after storms. Clean faces with a soft cloth and mild solution; abrasive tools can dull diffusion panels. The DOE also links longer LED life with reduced replacement demand, but heat remains a practical enemy. Keep vents clear and inspect connectors for corrosion. My checklist still misses small paint chips sometimes, so I now photograph them early and repair them before rust spreads. Track faults, power readings, cleaning dates, and replaced modules in a simple maintenance log.